


 Sign in
 Register now
 My Reward Points
DIY Shower Gel Recipe - For Every Skin Type
The shower gel is available in most drugstores and grocery stores, but it's also enjoyable to make your own at home and experiment with various formulations. There are various options for making homemade shower gels, including a basic version, a luxury creamy one, and a thick sea salt version.

Most DIY shower gels start with liquid castile soap, and you may then add your favourite essential oils, carrier oils, and other substances to customize the scent and consistency of the gel. This blog will discuss the benefits of producing homemade shower gel and how to produce the best DIY shower gel.
Benefits Of Making Your Shower Gel
Making your shower gel can have numerous benefits beyond cleaning. Crafting your mix gives you control over the ingredients, resulting in a product tailored to your skin's exact needs. Here are five main benefits:
- Moisturising: Commercial shower gels frequently include harsh surfactants that remove natural oils, leaving the skin feeling dry and tight. You can add moisturising substances like almond oil, jojoba oil, or cocoa butter to your shower gel. These compounds replace lost moisture, leaving your skin feeling moisturised and nourished even after cleansing.
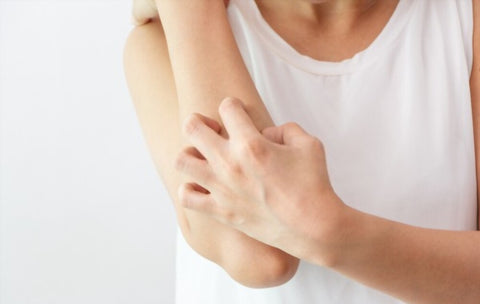
- Reduce Itchy Skin: Many store-bought shower gels contain synthetic perfumes and preservatives, which can irritate skin and exacerbate illnesses such as eczema or psoriasis. Homemade shower gels can be produced using soft, natural ingredients such as oatmeal, chamomile, or calendula, which are known for their soothing characteristics. These chemicals assist in reducing irritation and itching, making them ideal for sensitive or reactive skin types.

- Anti-Ageing Properties: Certain natural components contain antioxidants that can help protect the skin from environmental harm while also promoting collagen formation, minimising the appearance of fine lines and wrinkles. Consider adding green tea extract, vitamin C, or rosehip oil to your homemade shower gel for an extra anti-ageing boost.
- Skin Irritations: If you have skin allergies or sensitivities, store-bought shower gels containing synthetic dyes, scents, and preservatives may be problematic. Making your shower gel allows you to avoid these potential irritants and instead concentrate on soft, non-irritant components such as pure essential oils, natural clays, and herbal extracts.
- Repair Cracked Dry Skin: Harsh weather, frequent handwashing, and chemical exposure can all cause skin to feel dry, rough, and cracked. Homemade shower gels packed with shea butter, coconut oil, or honey offer emollient and humectant characteristics that help seal in moisture, soothe rough spots, and stimulate skin restoration, restoring smoothness and suppleness.
Homemade Moisturizing Shower Gel
This DIY shower gel has a pleasant perfume that is both fresh and zesty. It actually smells great in the shower! Grapefruit and bergamot essential oils offer excellent cleaning and antimicrobial effects. Both are wonderful stress-relieving oils that can assist in regulating your mood and stimulate your thoughts. Perfect for a morning shower.

Ingredients
- Liquid Castile Soap - 1 Cup
- Aloe Vera Gel - 1/4 Cup
- Vegetable Glycerin - 1 Tablespoon
- Sweet Almond Oil - 1 Tablespoon
- Lavender Essential Oil - 5-7 Drops
- Grapefruit Essential Oil - 5-7 Drops
- Bergamot Essential Oil - 5-7 Drops
Directions - Step by Step
Step 1: Clear a clean, level area and gather all of the required ingredients and equipment. Make sure the containers for storing the shower gel are clean and dry.
Step 2: In a mixing basin, mix the liquid castile soap, aloe vera gel, vegetable glycerin, and sweet almond oil. Stir the mixture carefully until all of the ingredients are well combined.
Step 3: Once the base components have been properly blended, add the lavender, grapefruit, and bergamot essential oils. Essential oils not only have pleasant smells, but they also provide extra skincare advantages. Stir the mixture again to ensure that the essential oils are properly distributed.

Step 4: If you like a thicker consistency, add additional aloe vera gel or glycerin to the recipe. If you prefer a thinner consistency, dilute the mixture with a tiny amount of distilled water.
Step 5: Carefully transfer the homemade shower gel to clean, dry containers. Use a funnel if necessary to prevent spills and guarantee a clean transfer.
Step 6: Label each container with the date of preparation and what kind of essential oil is used (if any). To extend the shelf life of your homemade shower gel, store it in a cool, dark spot away from direct sunlight.
Step 7: To use, squeeze a tiny amount of homemade shower gel onto a loofah, sponge, or washcloth. Lather on damp skin, then rinse well with warm water. After each shower, enjoy the exquisite sense of clean, nourished skin.
Conclusion
Making your shower gel brings up a plethora of options for individualised skincare. By creating a blend matched to your skin's specific requirements, you can say goodbye to harsh chemicals and welcome healing, natural elements.
Not only does this DIY approach provide a more sustainable and environmentally friendly solution, but it also gives you the satisfaction of creating a product from scratch. VedaOils' natural ingredients provide the perfect base for your DIY shower gel. Visit us today at www.VedaOils.com and save 10% on your first order.
You May Also Like:
Buy Products
-
 Black Pepper Essential Oil
 -
 Castile Soap Base
 -
 Grapefruit Essential Oil
 -
 Lavender Essential Oil
 -
 Vegetable Glycerin - 99.7% Grade (Food Safe)


Related Articles
-
 DIY Hair Pomade - Easy Homemade Recipe With & Without Beeswax
 -
 DIY Glycerin Moisturizer – 3 Natural Homemade Recipes For Face
 -
 DIY Cleansing Oil - Best Homemade Recipe For All Skin Types
 -
 How to Make Marble Candles | DIY Marble Pillar Candle
 -
 DIY Tanning Oil - Best Homemade Recipes For Tan Removal
 -
 Homemade Mustache Wax: Best DIY Recipe With Natural Ingredients


Disclaimer :- This article is intended for informational and educational purposes only and should not be considered a substitute for professional medical advice. For specific health concerns or treatment, please consult your personal physician. The article's editor, writer, and VedaOils organization do not assume any responsibility for any health outcomes resulting from the information provided. Readers are strongly encouraged to seek advice from their physician before acting on any recommendations made in these articles.