How to Make Petroleum Jelly at Home - Simple DIY Recipe & Benefits
Elevate your beauty and skincare routine with a versatile product that's a must-have in your bathroom – petroleum jelly. While it's a go-to for many, concerns about the potential toxicity associated with using a petroleum byproduct may deter some individuals. The reassuring news is that if you're hesitant about using traditional petroleum jelly, you can create natural alternatives right in your own home.

Whether you prefer a minimalist approach with just two ingredients, desire an ultra-moisturizing version, or opt for a vegan variant, crafting your homemade "Petroleum Jelly" ensures you have a tailored solution without the need to purchase another tub. Uncover the simplicity and customization of how to make petroleum jelly at home.
How to Make Petroleum Jelly At Home
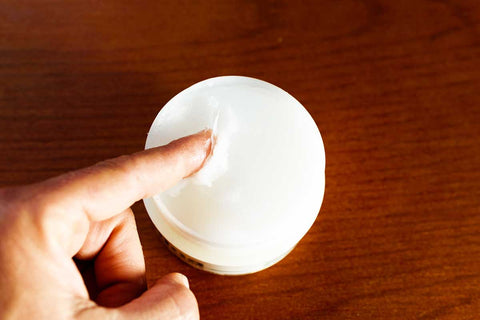
A natural alternative to "petroleum" jelly can be made at home. It's really simple to create and only requires simple ingredients! You can apply it to dry, irritated skin in the same ways that you would apply conventional Vaseline. Here is a How to Make Petroleum Jelly at Home.
DIY Petroleum Jelly Ingredients
Unlike other types of Petroleum jelly, which you may not be aware of the ingredients used, homemade petroleum jelly allows you to know exactly what was used to make it. Making your own moisturizer that is ideal for your skin type, preferred fragrance, and spending limit is even more fascinating. Now let's have a look at the ingredients on how to make petroleum jelly at home:

Ingredients:
- Virgin Coconut Oil - 1 Cup
- Virgin Olive Oil - 1 Cup
- Beeswax - 2 Tablespoons
- Tea Tree Essential Oil - 10 drops
Homemade Petroleum Jelly Recipe - Step By Step
The recipe includes the best ingredients for softening skin and improving suppleness. It is the perfect element for skin care because it helps retain moisture and gives skin texture and feel. The ingredients used are rich in anti-inflammatory, anti-oxidant, anti-bacterial, and germicidal properties. Since we already know the benefits about the ingredients, now let's get straight into the process of how you can make it.

Step 1: Place a glass bowl in a saucepan. Fill the half of a saucepan with water to make a double boiler.
Step 2: When the double boiler is ready, put 1/4 cup of coconut oil and 2 tablespoons of beeswax in the bowl. It should take around 5 minutes to completely melt the ingredients when heated on medium-low in the pan.
Step 3: Remove the pan from the heat once the beeswax and coconut oil have melted.
Step 4: To make the mixture smooth, stir it once more.
Step 5: Then, add 1/8 cup of the olive oil and tea tree essential oil and whisk the mixture until it is creamy but still pourable.
Step 6: Pour the homemade petroleum jelly mixture carefully into a glass jar or other container with a cover after you have finished whisking it.
Step 7: Before using the petroleum jelly let it cool for two to three hours so that it can solidify.
Step 8: The homemade petroleum jelly will remain fresh for up to a year at room temperature.
Conclusion
The final product has a texture that is comparable to that of standard petroleum jelly, but it also has the advantages of being made with all-natural ingredients. Small cuts and burns can be treated with the anti-inflammatory and antibacterial characteristics of beeswax. Olive oil also has a lot of healthy antioxidants and is very hydrating for the skin.If you are thinking about making your own DIY organic petroleum jelly you can get all the ingredients from the website of VedaOils at a reasonable price.
You May Also Like:
Buy Products
Related Articles
-
 How to Make Marble Candles | DIY Marble Pillar Candle
 -
 DIY Tanning Oil - Best Homemade Recipes For Tan Removal
 -
 Homemade Mustache Wax: Best DIY Recipe With Natural Ingredients
 -
 Kojic Acid vs. Glycolic Acid: Which Is Better for Skin Whitening?
 -
 5 Best Grades of Essential Oils - The Grading System
 -
 How to Make Rose Petal Powder For Skin Care Homemade Recipe
Disclaimer :- This article is intended for informational and educational purposes only and should not be considered a substitute for professional medical advice. For specific health concerns or treatment, please consult your personal physician. The article's editor, writer, and VedaOils organization do not assume any responsibility for any health outcomes resulting from the information provided. Readers are strongly encouraged to seek advice from their physician before acting on any recommendations made in these articles.


 Sign in
 Register now
 My Reward Points


