Orange lip balm added a citrus note with a slightly bitter sour and sweet flavor to the mix, as well as vitamin C's citrus properties. Lip balms help treat these problems by exfoliating dead skin cells, keeping the lips moisturized, and delivering important nutrients. The impacts of the environment and bacteria are most noticeable on your lips. In addition, the lips are the most affected by hot and cold conditions.

On the other hand, the sun is always harsh on your lips. Your lips will become dry, scarred, and torn as a result of these impacts. Synthetic base lip balms can help with lip problems, but they can also cause more harm than good in the long term, so making your own homemade orange lip balm is a wonderful option. We'll go through the benefits of the ingredients and provide step-by-step recipes for you to follow in this blog.
How To Make Orange Peel Lip Balm at Home
Making homemade orange lip balm is simple and effective, as only a few ingredients are necessary. To summarise, melt and thoroughly combine all of the components in a double boiler, then fill your selected container with the liquid and allow it to cool for a day before applying it twice a day for the best benefits.
Orange Lip Balm Ingredients List
There are only four components in this recipe, with the option of adding a fifth (colorant) if desired. This meal is easy to make, and the ingredients are both organic and nutrient-dense. Your ruff lips will be transformed into smooth textured lips thanks to the vitamins and minerals in this recipe.

- Orange Flavor Oil - 2 Drops
- Virgin Coconut Oil - 2 Tablespoons
- Shea Butter - 1 Tablespoon
- Beeswax - 1 Tablespoon
Orange Lip Balm Ingredient Benefits
Knowing your ingredients will give you an advantage because they are effective in a variety of applications and have capabilities that are gained by different vitamins and minerals. We've listed the advantages that these components provide in your recipes, as well as suggestions for other ways to use them.
- Orange Flavor Oil: Flavonoids, anthocyanins, and polyphenolics improve the flavor of this Flavored Oil, which is high in Vitamin B, folate, and potassium. Orange Flavor Oil gives your food a delightful zesty scent that will give you an energy boost right away.
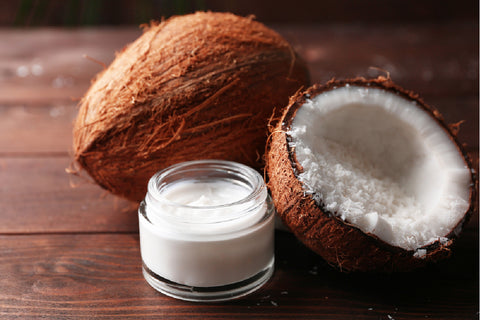
- Virgin Coconut Oil: Virgin coconut oil, high in vitamin E, K, and iron, exfoliates the lips, removing dead skin and germs. Vitamin E also protects against environmental toxins and UV damage. This oil also softens the skin and gives the user's lips a smooth texture.

- Shea Butter: This butter is well-known for its anti-inflammatory characteristics, which help relieve irritation from dry, infected lips and provide a relaxing sensation and cure for those who use it. Shea butter has unrivaled moisturizing characteristics, providing crucial nutrients to the lips to help heal cuts and scrapes.
- Beeswax: Beeswax not only serves as a binder for the mixture but also includes numerous vitamins and minerals. This chemical keeps the lips moisturized while protecting them from pollution and the sun. In addition, the waxing qualities of beeswax improve the sheen of your lips while also removing dead cells.
DIY Orange Lip Balm Recipe - Step By Step
And there are just a few ingredients in the orange lip balm recipe, and it is quite easy to follow. In addition, we've provided step-by-step instructions for making your own DIY orange-flavored lip balm, so simply follow them.
Step 1: Make a temporary double boiler by placing a water-filled bowl underneath an empty one on the heat.

Step 2: Melt 1 tablespoon shea butter and 1 tablespoon beeswax in a double boiler, then thoroughly combine them.
Step 3: Pour in 2 tablespoons of coconut oil and stir well, keeping the flames or heat to a minimum.
Step 4: Add 2 drops of flavor oil to the mixture and stir to integrate everything.
Step 5: If desired, you can use an edible colorant to give your lip balm orange.
Step 6: Fill the container of your choice with the mixture.
Step 7: Allow the mixture to cool for 18 to 24 hours.
Step 8: To get the best results, use the mixture twice a day.
Step 9: The mixture can be kept for 3-4 months in the refrigerator.
Step 10: Apply it more if you have dried and damaged lips.

Notes:
To Avoid a Hole in Your Lip Balm: As homemade lip balm solidifies, it develops a hole in the middle. Fill the tubes almost to the top to avoid this. Allow a 10-minute cooling period before adding additional melted liquid to the top to fill the hole.
Keep the Mixture Melted: If the liquid hardens or solidifies as you fill the tubes, return it to the fire for a minute or two until it melts again.
Conclusion
The orange lip balm recipe is for you if you're looking for a homemade solution to your problem. This recipe is simple to prepare and requires little time, effort, or materials.
This homemade lip balm successfully decreases the impacts of pollutants while offering comfort, protection, and rich-looking lips, thanks to its qualities. If you haven't tried it yet, we recommend that you do so since we are confident that it will improve your lifestyle.


 Sign in
 Register now
 My Reward Points


